This project uses an Adafruit Feather M0 Express module with a Microchip ATSAMD21 processor running at 48 MHz and can be purchased from Adafruit. Alternatively, you can use almost any Feather compatible processor module such as the SparkFun ThingPlus SAMD51, or the Adafruit Feather M0 WiFi, or even an RP2040 Feather processor module. These have all been tested with the software (some pin numbers and variable definitions need to be changed, but that is noted in the software comments).
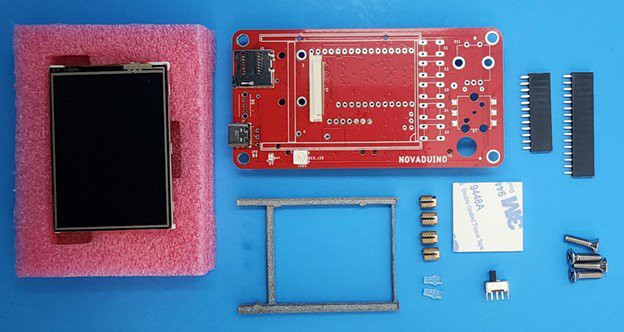
The Feather processor plugs into the back of the Novaduino Display PCB after soldering the headers. The Novaduino PCB comes with a color resistive touch 2.4" display, 3 tact switches, and one rotary encoder as well as an enable switch. The Novaduino Display KIT001 can be purchased on Tindie.
One change that is needed for every new build is to set your elevation in the code. To display Barometric Pressure at equivalent sea level, you need to adjust MYALTITUDE in the software to match your actual altitude above sea level (in feet). This can be found on the internet by doing a search for “what is my elevation.” We have used "whatismyelevation.com" to successfully determine our altitude.
You can also set MYALTITUDE to 0.0 to determine the actual Barometric Pressure at your location. Weather stations, however, typically provide equivalent sea level Barometric readings.
We plan to add the ability to set the MYALTITUDE variable via the rotary encoder in a future release of the software.
You should probably also calibrate your sensors. We have provided variables for this purpose for temperature, humidity, and pressure, but these are not guaranteed to be the best method of calibration as it is only a calibration at one point. Actual calibration may not be linear, we have not determined this, so it is up to you to determine.
Although the sensors are high quality, please do not use this Environmental Sensor for any critical applications, we do not guarantee its accuracy. Please refer to the BOSCH ENS280 and the SCIOSENSE ENS160 data sheets and specifications.
If the assembly and software loading directions below are too brief to follow, I have included much more detail, photos, and screen shots in the Environmental Sensor Assembly Manual linked below.
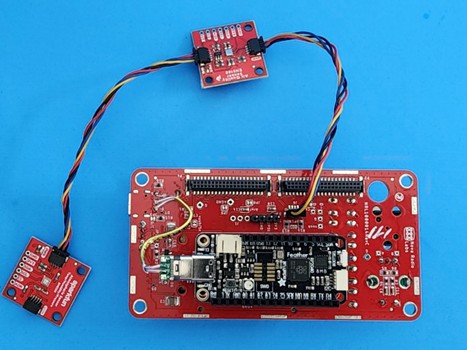
The cardboard gasket along with the sensor enclosure serves to thermally isolate the BME280 temperature/humidity/pressure sensor from the rest of the unit for more accurate readings. The first time we built this Environmental Sensor we used a module that had both the BME280 and the ENS160 right next to each other on the same pcb module. Strangely the temperature seemed very accurate when we first turned the unit on but within a few minutes it was reading too high by about 10 degrees F. We later figured out that the ENS160 internal air quality sensors function by heating up the air with a small heater that was affecting the adjacent BME temperature readings. We devised a sensor enclosure and spaced the two sensors as far apart as possible to reduce this effect. Even with this thermal isolation, we have found that the temperature measurement is about 2 degrees too high, so we added the TEMPCAL variable to the software to allow correction. We don't guarantee that our calibration is correct, it is up to you to calibrate your own Environmental Sensor and to determine if a more complex calibration algorithm is necessary. This statement also goes for the Humidity calibration and the pressure calibration; it is up to you to determine their suitability.
 Lithium ION
 Turo Heikkinen
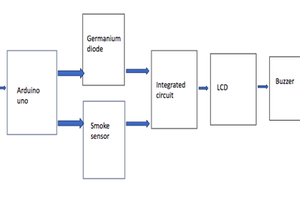
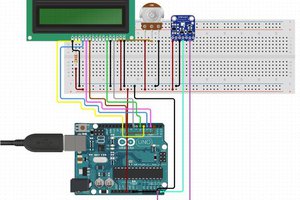
 hIOTron