Close
0%
0%

OrbitClock – a Tiny Space IoT Environmental Clock

OrbitClock blends futuristic design with IoT tech. It shows real-time NTP time and environmental data in a sleek satellite-style form.

Public Chat
Similar projects worth following
Meet OrbitClock — a tiny satellite-inspired IoT clock that brings space tech to your desk! ? Designed in Autodesk Fusion 360 and powered by the DFRobot Beetle ESP32-C3, it syncs time from the internet just like real satellites, displaying time, temperature, and humidity on a glowing 0.91" OLED screen. With its 3D-printed spacecraft body, landing legs, and smart NTP-based precision, OrbitClock is more than just a timepiece — it’s a mini space mission in your room. ?✨

Time and space are deeply connected — satellites orbit Earth to keep our clocks synchronized with incredible precision. Inspired by that idea, I created OrbitClock, a tiny space-themed clock that brings the beauty of satellite technology right to your desk.

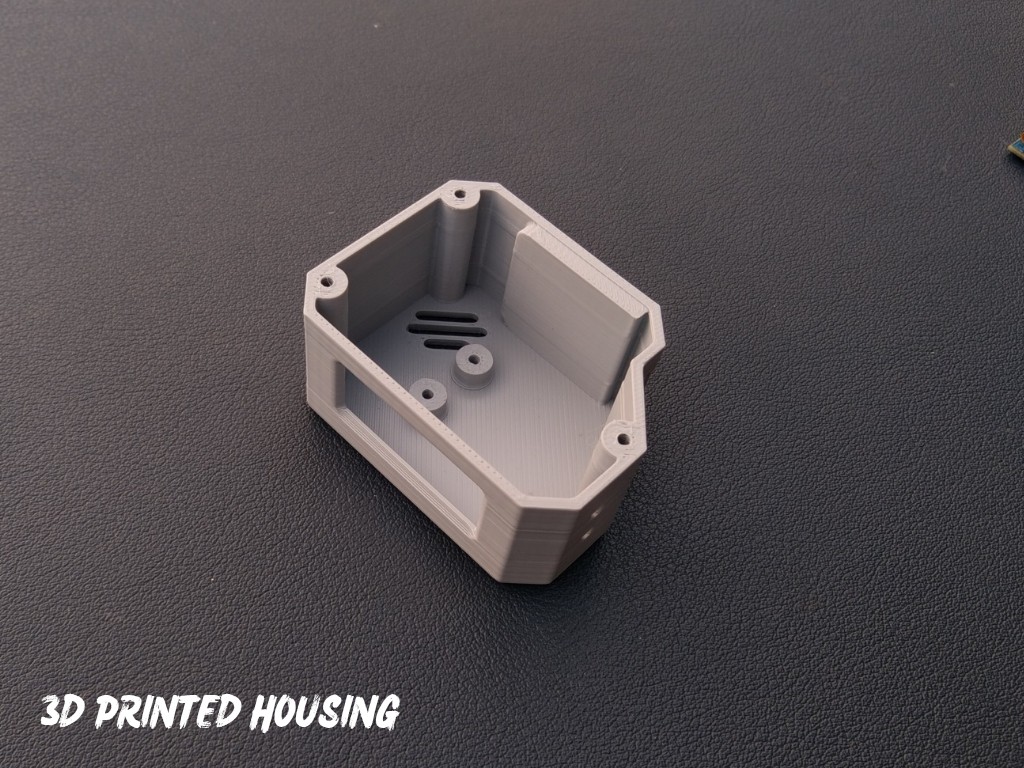
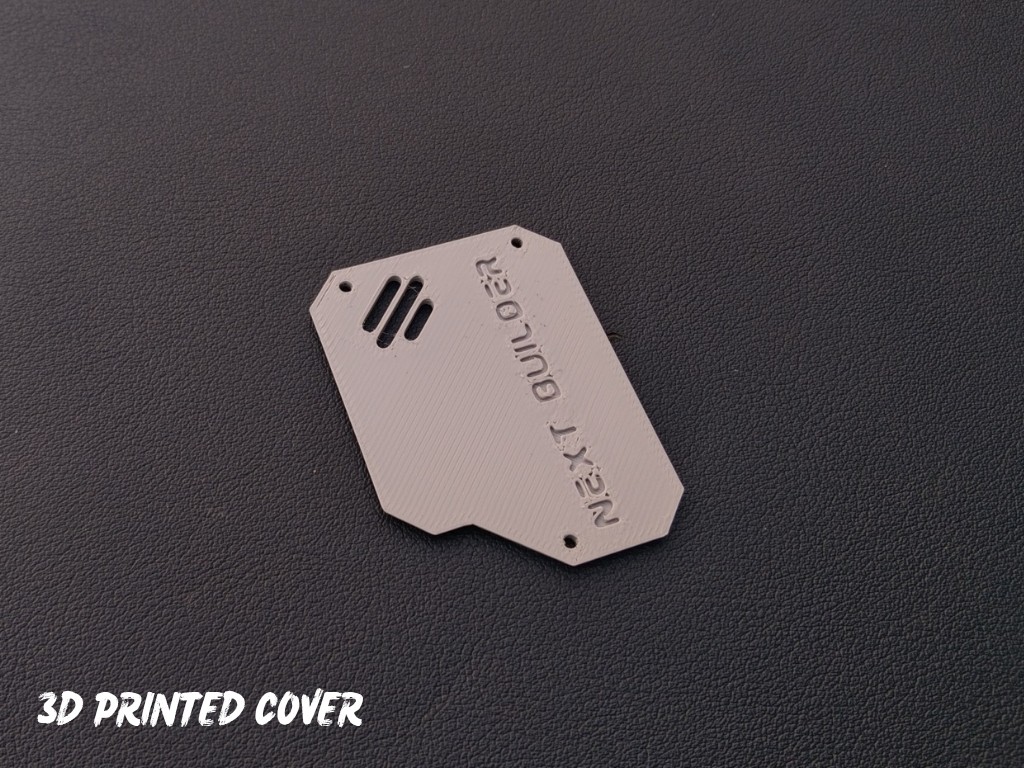
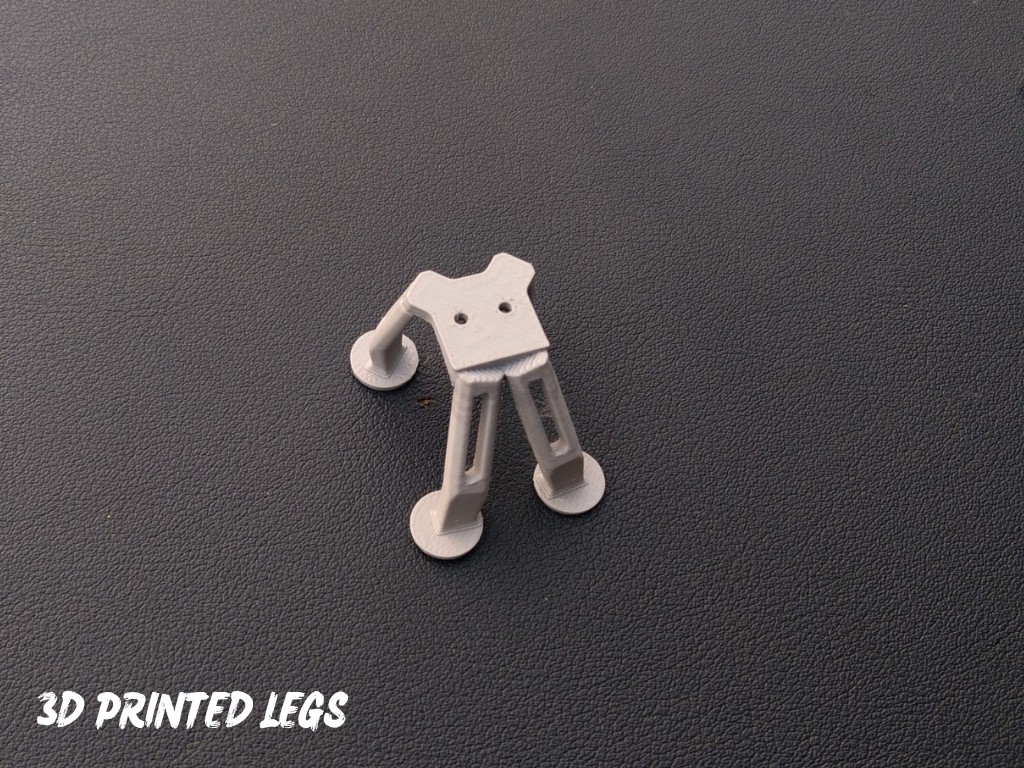
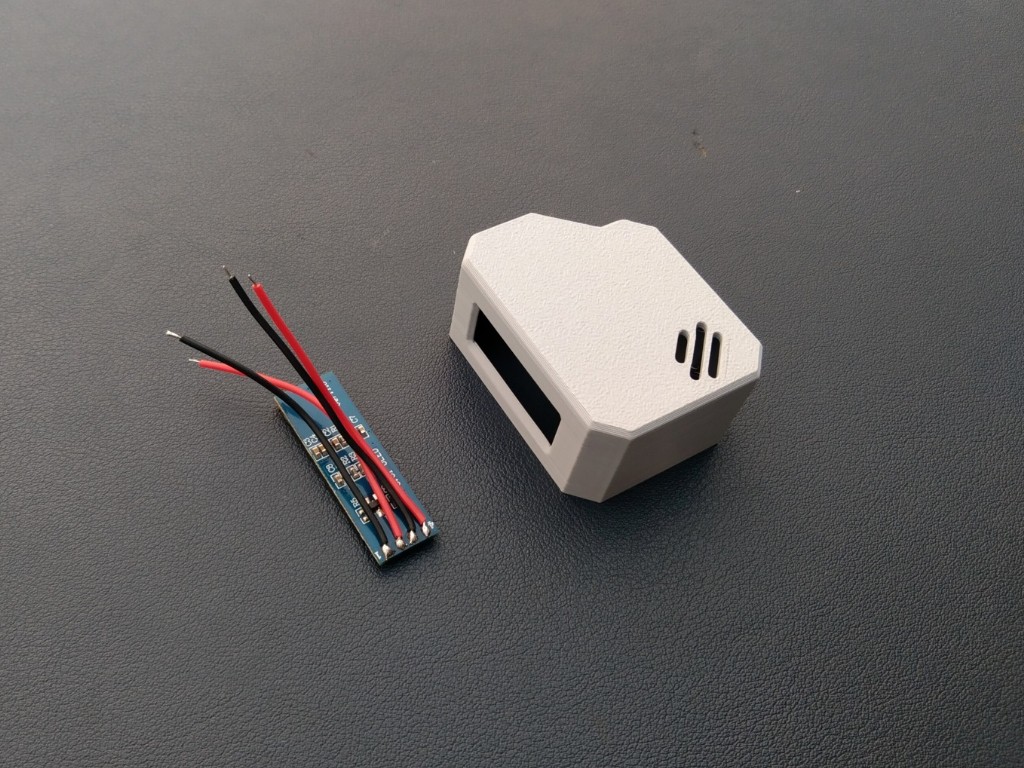
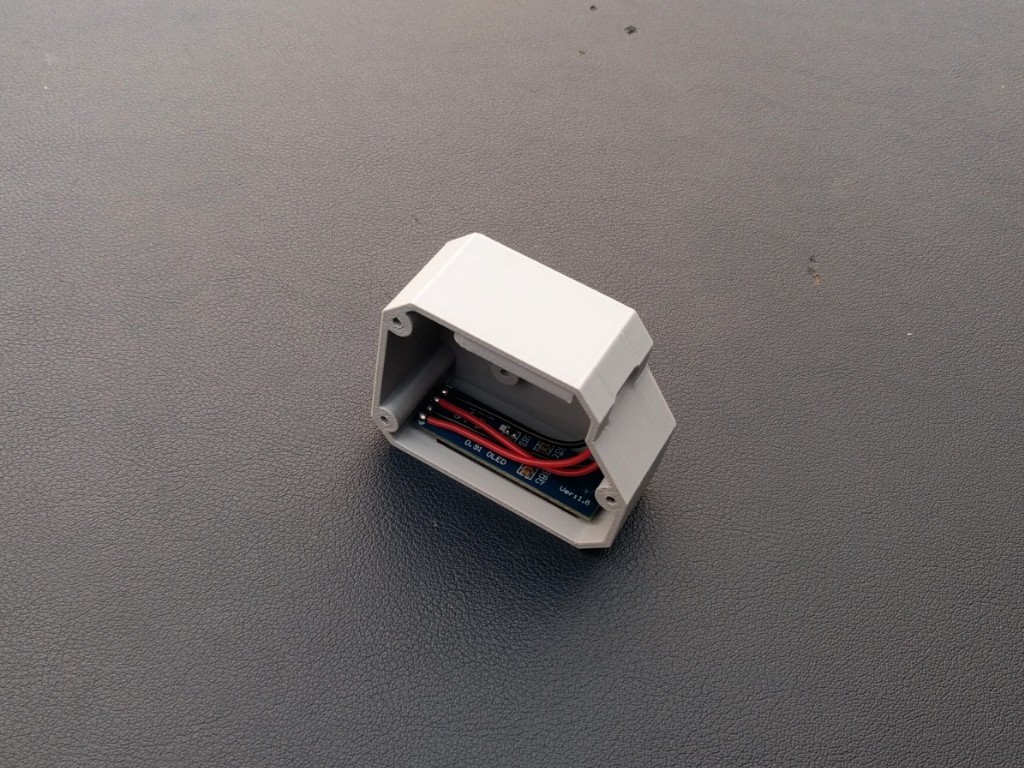
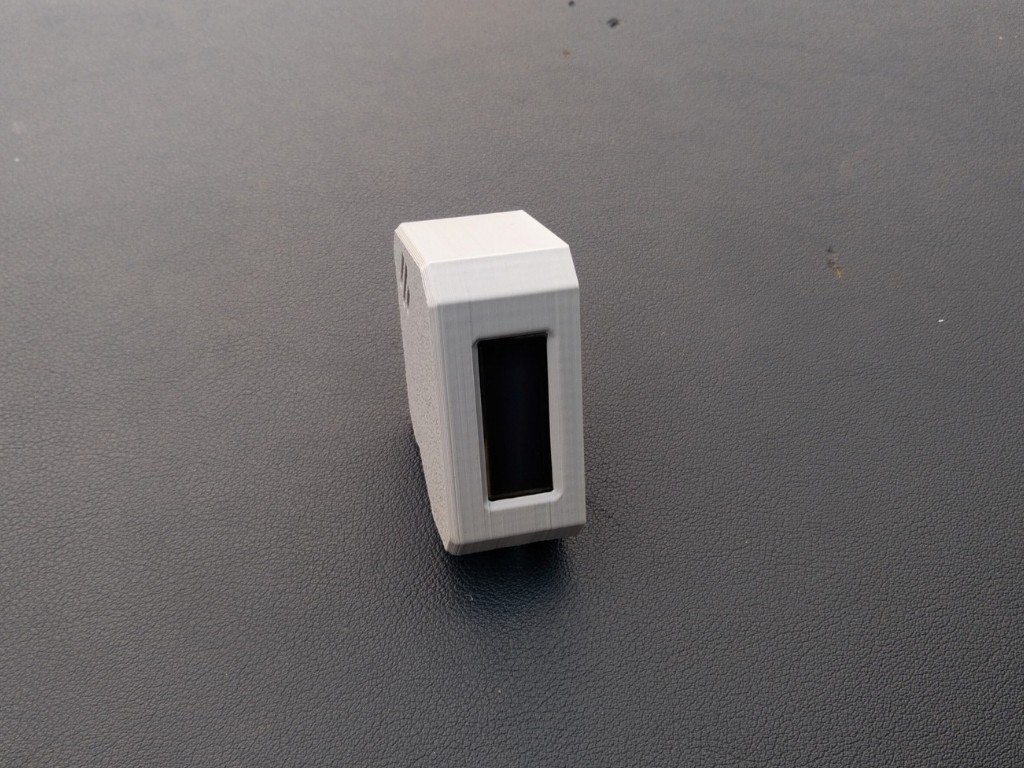
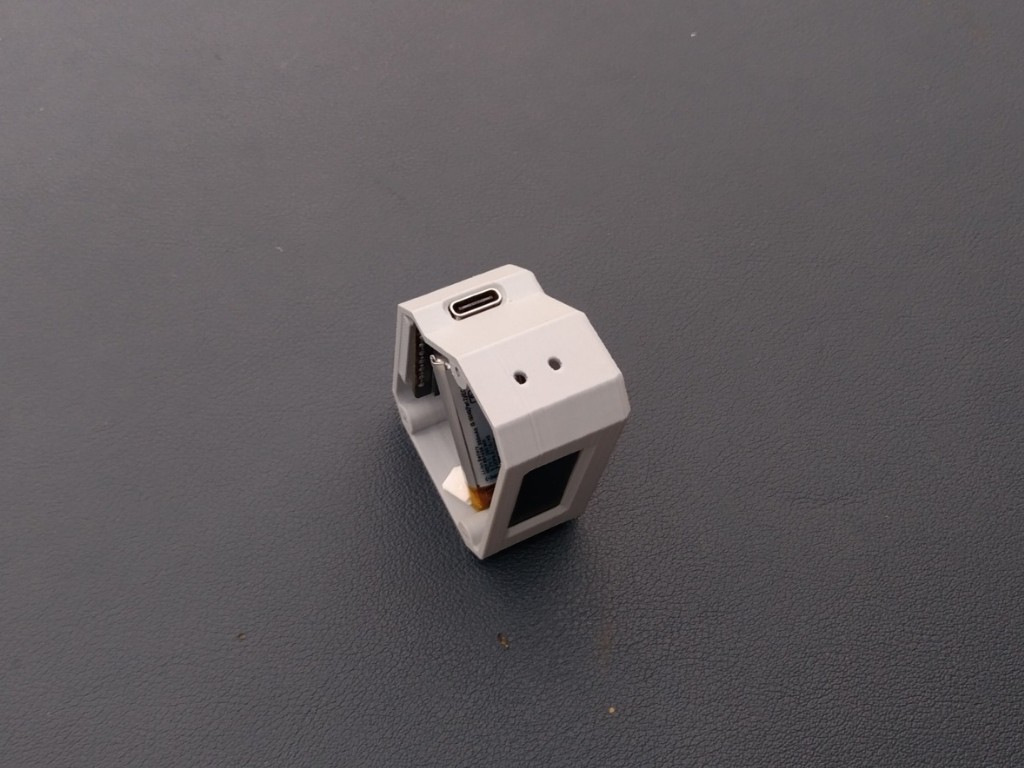
Designed in Autodesk Fusion 360, the OrbitClock’s 3D-printed body stands proudly on four landing-style legs, giving it the look of a mini spacecraft that just touched down on your table. On the front, a 0.91-inch OLED display shows a clean and futuristic readout labeled SPACE, featuring the current time, temperature, and humidity in real time.

Powered by the DFRobot Beetle ESP32-C3, this smart clock connects to Wi-Fi and automatically retrieves the correct time from the internet using Network Time Protocol (NTP) — just like real satellites synchronize with Earth-based systems. The onboard SHTC3 sensor continuously monitors temperature and humidity, providing accurate environmental data alongside the clock display.

With its sleek design, glowing display, and precise wireless timekeeping, OrbitClock isn’t just a clock — it’s a mini space instrument observing your surroundings just like satellites observe our planet. 🌍✨

Sponsored By NextPCB

If you’re planning a PCB project, NextPCB is the ultimate partner for makers and engineers. They offer reliable multilayer PCBs, turnkey PCB assembly, layout design, free DFM analysis software, and component purchasing. With 5 PCBs starting at just $1.90 and high-quality fabrication, NextPCB makes prototyping faster, easier, and more reliableSign up using my link and get $20 off as a new customer!

For makers looking for a head start, NextPCB’s Newcomer Event is perfect. Grab your first free PCB prototype, explore special deals, and experience how easy and affordable prototyping can be. Don’t miss this opportunity to kickstart your electronics journey and bring your projects to life with NextPCB Free PCB Prototype Event

circuit_image.png

Complete Connection of Orbit Clock

Portable Network Graphics (PNG) - 1.80 MB - 11/01/2025 at 03:57

Preview

Battery Connection.jpg

Battery Connection With Beetle ESP32-C3

JPEG Image - 33.26 kB - 11/01/2025 at 03:56

Preview

Orbit Clock Legs.stl

For 3D Printing

Standard Tesselated Geometry - 115.90 kB - 11/01/2025 at 03:56

Download

Orbit Clock Cover.stl

For 3D Printing

Standard Tesselated Geometry - 237.78 kB - 11/01/2025 at 03:55

Download

Orbit Clock Housing.stl

For 3D Printing

Standard Tesselated Geometry - 183.87 kB - 11/01/2025 at 03:54

Download

  • 1 × DFRobot Beetle Esp32-c3
  • 1 × 0.96" OLED Display
  • 1 × DFRobot SHTC3 Sensor
  • 1 × 350 mAh Lipo Battery

  • 1
    CAD & 3D Printing

    To begin this project, I designed the OrbitClock in Autodesk Fusion 360, carefully keeping all the component dimensions and aesthetics in mind. My goal was to make it small, futuristic, and easy to assemble, just like a real mini satellite.

    The design features a clean body with a front display window, cooling vents, and landing-style legs that give it a true space-inspired look. It’s also 3D-printing friendly, requiring no complex supports or post-processing. You can easily view or edit the CAD model using the Fusion 360 web viewer, and feel free to customize the design to match your own style or components.

    For 3D Printing, You can directly download the required STL files below:

    • Housing.stl
    • Cover.stl
    • Legs.stl
  • 2
    Display Assembly

    Let’s start by assembling the OLED display into the 3D-printed housing. Before placing it inside, I soldered four wires to the display pins — VCC, GND, SCL, and SDA — so that connecting it to the microcontroller later becomes quick and easy.

    Once the wires were attached, I applied a tiny amount of super glue along the edges of the display and carefully fixed it into the dedicated display slot on the front panel. Make sure it’s aligned properly and sits flat for a clean look.

  • 3
    Microcontroller Assembly

    After completing the display assembly, it’s time to mount the Beetle ESP32-C3 microcontroller. Apply a small amount of super glue on the back side of the board and carefully place it in its dedicated slot inside the enclosure.

    Make sure the Type-C port is perfectly aligned with the opening on the case so that you can easily connect the cable later. Hold it in place for a few seconds until the glue sets properly.

View all 12 instructions

Enjoy this project?

Share

Discussions

Similar Projects

Does this project spark your interest?

Become a member to follow this project and never miss any updates